Why Kitchen Drawers Get Chaotic So Fast
Kitchen drawers are opened dozens of times a day, by multiple people, under time pressure. That frequency - combined with the sheer variety of small tools a kitchen accumulates - makes them the fastest-filling clutter zone in most homes. Unlike a pantry shelf or a cabinet, a drawer offers no visual cues once it's closed: out of sight, out of mind, until you're mid-recipe and hunting for a whisk buried under a tangle of skewers and bread bag clips.
The core problem is usually the absence of a system, not a lack of space. Most kitchen drawers have enough room for what a household genuinely uses - they're just carrying items that don't belong there, duplicates that were never culled, and tools that arrived without a designated home. Once you introduce clear categories and defined zones, the same drawers that felt overwhelmingly full often turn out to have room to spare.
The mise en place mindset - the practice of organizing your workspace before you cook - also applies to the drawers themselves. A drawer you can read at a glance means faster prep and less frustration.
What you will need
Tape measure
Measure the interior dimensions of each drawer before purchasing any dividers or bins.
Drawer dividers or bins
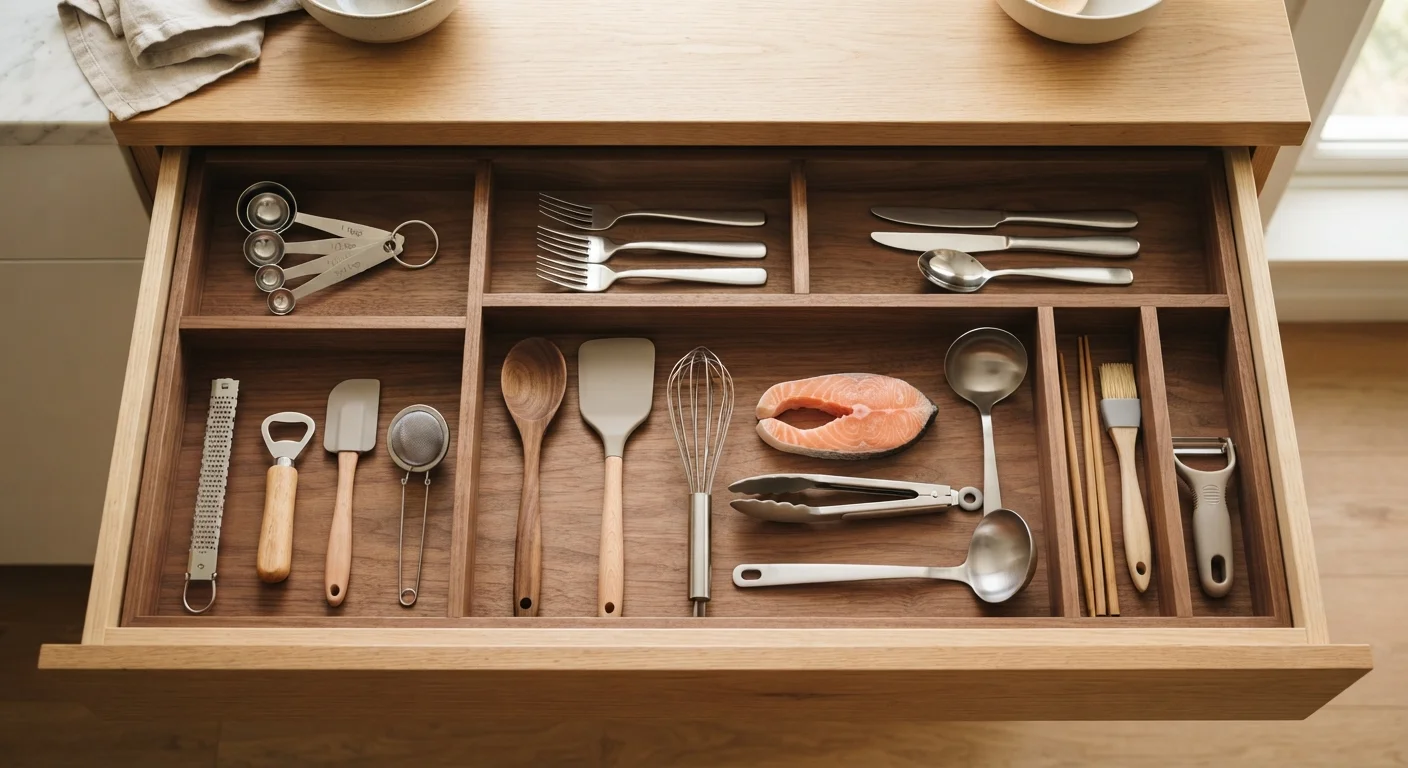
Create defined zones within a drawer so categories of items stay separated and findable.
Non-slip drawer liner
Keeps dividers and loose items from sliding when the drawer is opened and closed.
Label maker or adhesive labels
Marks zones in shared-household drawers so everyone knows where items belong.
The Step-by-Step Reorganization Process
Follow the steps below to work through each kitchen drawer methodically. The full process takes 30 to 90 minutes depending on how many drawers you're tackling and how much sorting is needed. Do it once properly, and the monthly maintenance becomes trivial.
Don't Skip the Full Empty-Out
Organizing around existing contents almost always fails. You'll nest new dividers around items you don't actually need, and the drawer will revert to chaos within weeks. Emptying completely - even if it creates a temporary mess on the counter - is the non-negotiable first step that makes everything else work.
Pull everything out completely
Open each drawer you're tackling and remove every single item - don't edit as you go. Place everything on the counter or table where you can see it all at once. Wipe the drawer interior clean before you put anything back. This blank-slate approach forces you to make intentional decisions rather than organizing around habit.
Sort items into categories
Group everything into loose categories: cutting and prep tools, cooking utensils, serving tools, measuring equipment, miscellaneous gadgets, and items that don't belong in the kitchen at all. Don't worry about drawer placement yet - you're just getting a clear picture of what you own. If you find duplicates (three vegetable peelers, four can openers), set the extras aside for the discard step.
Decide what actually stays
Go through each category and ask: Do I use this regularly? Does it work properly? Does it earn its space? Items you haven't touched in a year, broken gadgets, and mystery tools with no clear purpose should go. For a broader approach to paring down before you organize, see our guide to decluttering from scratch. Also check out which kitchen tools genuinely earn their keep before deciding what to keep.
Assign each drawer a single purpose
Match your sorted categories to specific drawers based on where you use those items. Prep tools go near the cutting board area; cooking utensils belong beside the stove; measuring tools can share a drawer with prep gear. The goal is one dominant purpose per drawer. Mixed-purpose drawers are where chaos re-establishes itself. For a deeper look at how storage decisions shape organization habits overall, open shelving vs. closed cabinets is worth reading alongside this process.
Measure, then buy dividers
Use a tape measure to record the interior width, depth, and height of each drawer. Take these measurements with you - or have them handy when ordering online. Look for dividers that span the full depth of the drawer to prevent items from sliding behind them. Adjustable or modular bins work well if your needs change over time. For help thinking through fixed versus flexible storage systems, see our guide to fixed organizers vs. flexible bins.
Load drawers intentionally and maintain them
Place items back in their assigned drawer with the most frequently used tools at the front. Lay flat items that can stack, and stand taller tools in deeper bins. Once everything is in, do a quick rehearsal: reach for the spatula, find the can opener, grab a measuring spoon. If anything feels awkward, adjust placement now. Plan a brief monthly reset - a five-minute tidy where items that have drifted go back to their zones. Understanding why clutter returns is also useful; our article on why clutter comes back covers the behavioral patterns that undermine organization over time.
Assign Drawers by Activity Zone
Think about where in the kitchen each task happens - prep, cooking, serving, cleaning - and store tools closest to where you use them. A spatula stored near the stove gets grabbed instantly; buried in a far drawer, it causes a mid-cooking scramble. Activity-based placement beats alphabetical or categorical logic every time.
Avoid Buying Organizers Too Early
Purchasing bins or dividers before you know what's going back in the drawer is one of the most common organization mistakes. Wait until you've sorted and decided on your final items, then measure the drawer and shop for organizers that actually fit your space and needs.
Once your drawers are working well, the same principles extend naturally to other high-traffic storage areas. The garage organization guide applies a similar zone-based logic to a much larger space if you're ready to expand the project.
This article provides general home organization guidance. Results will vary based on individual household size, drawer dimensions, and the volume of items being sorted.